Style Guide
One thought on “Style Guide”
Leave a Reply
How I Make TF Sprite Sheets
You might be interested in making your own sprites in the Time Fantasy style.
You can go about creating sprites however works best for you. But I thought that some people might find it interesting and/or useful to see the process that I used to create the characters in the TF set.
(If you haven’t made a sprite or don’t know how to, you can check out my pixel art tutorials. This article isn’t about the details of pixel work.)
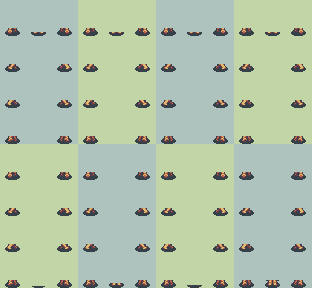
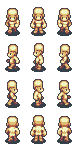
Since all the Time Fantasy character sprites are aligned in a particular way, I use a “feet sheet” that I’ve previously made. This is an what I use (it’s arranged for use in RPGMaker VX/Ace):
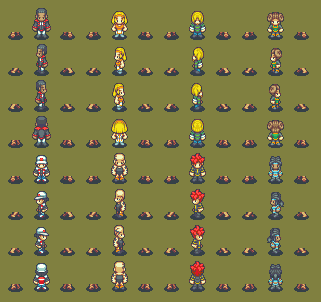
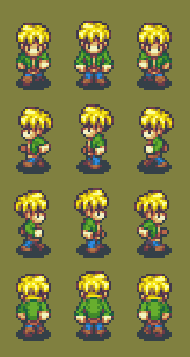
Since I make large packs with lots of characters, I’ll typically work with eight characters at a time (a regular RPGMaker sprite sheet has eight characters). I create all of their basic directions before I move on to animating them. This method has proven to be pretty efficient when making large amounts of sprites like this.
This is what a piece of my working file might look like before I begin animating the sprite sheets:
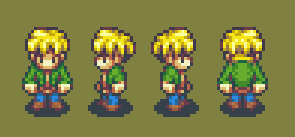
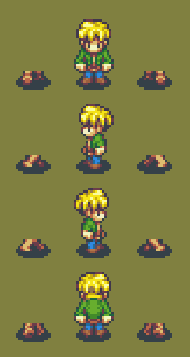
So let’s start with a sprite. Using the base, I’ve made his basic pose in all four directions:
I’ll line up the four standing poses onto the “feet sheet”.
You can see that it has the stepping-frame feet from the animated base, but not the top halves of the sprites. Instead of using the entire base, I’ll use the feet/legs from the base, but redraw the torsos for the different frames. For me, this method is faster when creating a lot of sprites.
Easiest way to start is by copying the head. I move it down one pixel for the stepping frames. This image illustrates what I mean:
Depending on the sprite, I might also copy the middle of the torso onto the other frames. Then draw arms to indicate the correct swinging motion. Then it’s easy to edit/color the legs to match the body.
Do it for all four directions (with some sprites, you only need to do it in three directions, and flip the side views), and then the sprite is finished and ready for use in games:
It’s a little distorted, so don’t try to use this one. If you want to use this character in your games, you can download the full character sheet here for free.
Chara Sprite Base
So if you want to make your own characters in the Time Fantasy style, here’s the base I created.
I’m pretty sure that it’s actually included in the pack, but it’s here for anybody who hasn’t bought it, or just for convenience.
Important note: This is at its original workable size. If your game is for RPG Maker VX/Ace, after you make your character, blow up the whole thing to 200% (keep the pixels precise).
UPDATE: I added a female base. You find it HERE.
Also these:

I don’t have animated sheets for both genders and both skin tones (not true anymore: see update). I personally don’t use the bases what way when I animate these sprites.
If you want to start making your own characters, but don’t have a lot of pixel experience, then you’ll probably find my tutorial useful:
Enjoy. 🙂
Colors
The most important part of any pixel style is the color choice. Time Fantasy graphics have a specific “feel” to the colors. But the colors themselves follow no specific rules: color choice is about using your eyes. Aim for a SNES-era tone or suggestion via style and not color limitation. Use it as inspiration rather than as an arbitrary restriction.
I believe that having a loose and flexible color palette will make it easier for other people to create their own graphics in the style of Time Fantasy.
Color Palette
I use GraphicsGale for my pixel art, so I’ve gone ahead and exported the palette from my working document for the Time Fantasy character sprites. Should work in GG, and other programs might be able to use it too.
Download .pal color palette file
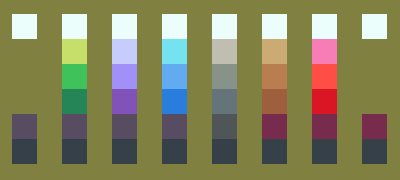
This is what it looks like:
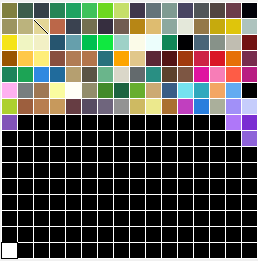
It’s messy and not particularly organized for other peoples’ use. If I were a purist then this would be a lot less colors. But instead I focused on the piece itself instead of worrying about color count. This palette was just something that naturally developed as I made the colors that I needed.
It’s a living thing. I continue to add colors and tweak them. But you might find it useful starting point.
You don’t HAVE to use this exact color palette. For all the talk about it being “16bit” or “SNES”, the TF style does not adhere to rigid color limitations.
Color Use
However, the colors are created to feel “right” together in a certain way. Feel free to add or change colors as you need, but follow the key stylistic choices within the color palette:
- You’ll notice that the darkest “black” on the sprite shadows/outlines is very far from being pure black (RGB: 53/64/73).
- Avoid pure white. Instead use a very light blue (RGB: 236/254/252) or yellow (RGB: 251, 251, 232).
- Some colors in this palette are very similar to others (lots of blue-grays, for example). When creating a sprite or a tile, choose one and stick with it. Try not to use two colors that are too similar in the same piece. Avoid using colors with too little contrast.
- There are a few different “blacks” on the palette above. I used them in different ways: for example one tileset uses a darker black than another. It’s about setting the right tone for the piece or area. But BE CAREFUL about using multiple “black” shades in a single object. When coloring, use or create a color ramp that builds towards (or from) your chosen “black” for that piece.
- Just a reminder to avoid things like photoshop soft brush tools or automatic anti-aliasing and stuff. They’ll create a bunch of extra colors that will look out of place.
Creating Colors
I’ve written a full tutorial on the subject of creating colors for pixel art. If you haven’t seen it, you can find it here:
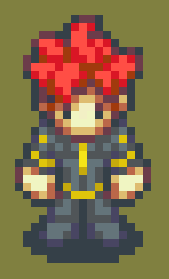
Here’s an example of some color ramps that I used when making the TF character sets.
Take two colors to be the ends: in each example here, the ramps begin and end on the same “white” and “black”.
- Don’t be afraid to wiggle a little with colors when you are trying to shade some kind of material.
- The bottom two colors are noticeably darker and have less contrast between them. This is because they were both used together to create “soft” outlines on characters. The pixels around this character’s hair, for example, show how I’d use those colors to retain an outline while accentuating the form of the cluster.
When working with the Time Fantasy style, here are some tips that will help you achieve a cohesive palette:
- Try to steer your ramps in the direction of existing colors.
- Darks tend to shift purple and lose saturation.
- Lights will shift either yellow or blue depending on material or tone.
- Of course, make exceptions when necessary for material, lighting or effects.
Have fun.
I just purchased your bundle on itch.io for $115.00 I was wondering I used your blank slate female model recently to build a wholly original character can i get the nude male so i can do the same with that model as well as the nude side view battle animation set for both?