Introduction
Yo. Uncle Despain here, with the latest entry in my series of RPG Maker VX Ace tutorials. Today I’m going to be explaining the map grid and its coordinates, and we’re going to create a puzzle where the player must push a block onto a weight-triggered switch in order to open a door. Once you understand the concepts in this tutorial, you will be comfortable creating a wide range of unique puzzles in your game.
This tutorial requires familiarity with the RPG Maker VX Ace interface, as well as a basic understanding of switches, variables, event pages, and conditional branches. If you aren’t comfortable with those topics, check out my tutorial on switches and variables before reading this.
Before we dive into creating events, it’s important to be able to make sense of the grid.
Understanding the Grid Plane
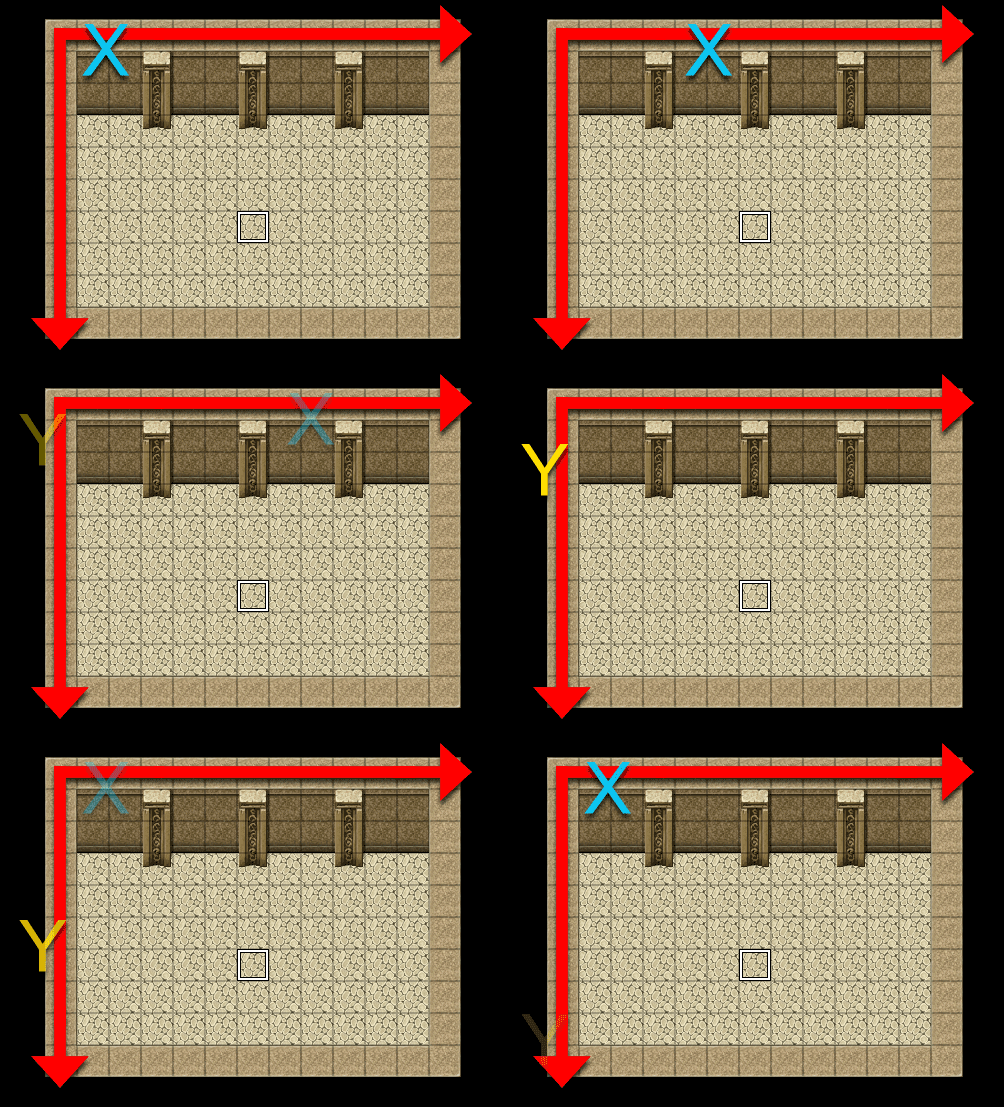
RPG Maker VX Ace uses a standard coordinate plane in its maps.
The plane is made up of tiles defined by two axes. The X axis is horizontal, and the Y axis is vertical. Imagine invisible lines across the map that allow you to measure the location of each tile:
Each map is made up of tiles, and each tile has an X and a Y coordinate.
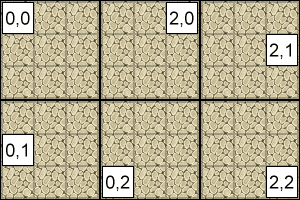
The first tile in the top-left corner of the map uses the coordinates 0,0. As you go further to the right, the X coordinate (X always comes first), gets higher. As you go further down, the Y coordinate gets higher.
If you look at the bottom of the editor, you can see some information about the current tile that you have selected. First, you can see the name of the map and its dimensions. After that, you can see the coordinates of the currently selected tile.
Watch how the coordinates change as you move your cursor around on the map. Pretty nifty!
With that out of the way, we can dive into creating our block-switch puzzle.
Using Coordinate Variables
So here’s the puzzle; it’s probably something you’ve seen plenty of times. The player finds himself in a room with a door and a switch. As long as the player stands on the switch, the door will open. But the moment the player steps off of it, the door slams shut. The player must push a box onto the switch to keep the door open.
I’d start off by setting up the door event. This way we have our end goal already established.
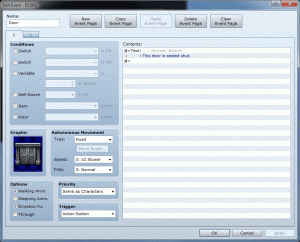 (click the image for a full view with animation)
You can see that it uses two pages and isn’t particularly special. Note the switch on page two’s conditions.
The next event that we need to make is the switch itself. When you create this event, make sure that the “through” option is checked (this will ensure that the player can push the box event onto this one), and that the “priority” is set to “Below Characters”. It’s important to set the “trigger” to Parallel Process:
Parallel Process means that the contents of the event will continually run in the background, as long as the player is on the map. The player doesn’t need to touch or interact with the event for it to be activated. This works for the switch because we’re going to be using coordinate variables to determine if the player is standing on the switch.
The first thing we want the event to do is keep track of the player’s position on the grid. We do this by storing the player’s coordinates into variables.
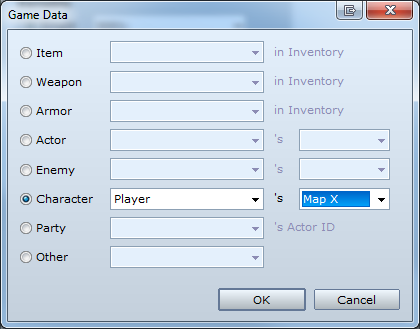
Insert a new event command: Control variables. Create a variable and name it “Player X”. We’re going to be storing the player’s X coordinate into this variable. For the operand, select “Game Data” and click on the “…” icon to bring up this window:
Choose “Character”: Player’s Map X.
After you’ve created the variable for the player’s X coordinate, do the same for the Y coordinate. Make sure to create a new variable for “Player Y”. Your event’s contents should look like this:
And remember that the “parallel process” will ensure that the contents continually run in a loop. So the switch event will continually update the variables as the player moves.
Next, we need to check if the player is standing on top of the switch. We can do this with a conditional branch and comparing the player’s coordinate variables to the coordinates of the switch.
If the switch doesn’t move around, we can figure out the coordinates by highlighting the event and looking at the bottom of the editor screen. In this case, the switch is located at 5, 7.
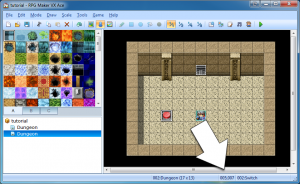 (click the image for a full view)
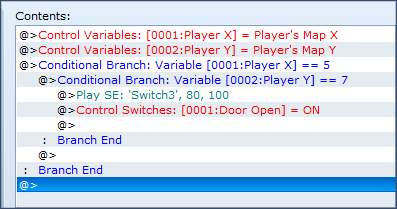
Create a conditional branch event command, and check if the “Player X” variable is equal to 5 (in your game, the coordinates might be different). Then, create another conditional branch—nested inside the first one—to check if “Player Y” is equal to 7.
Inside the second branch, you want to turn on the “Door Open” switch that we created when we were making the door event. It should look something like this:
It works like this: After the event updates the player’s coordinate variables, it will check if the player shares an X coordinate with the switch. If yes, then it will check if the Y coordinate is the same too. If it is, then it means the player must be standing on the switch, so the door will open up.
Now, we need to set it up so the door will close again when the player steps off the switch. Create another page in the same event, and set it up like this:
 (click the image for a full view)
Under Conditions, we need to make sure that the second page is active only when the “Door Open” switch is on. In other words, when the player is standing on the switch. It’s a parallel process again—and this will work similar to the way the first page worked: it will continually update the variables, and then it uses conditional branches to check them against the coordinates of the switch.
But here’s the difference: we want to make sure that the coordinates of the player do not equal the coordinates of the switch, so that the switch will turn back off when the player moves out of position.
Got it? Go ahead and give your game a test play.
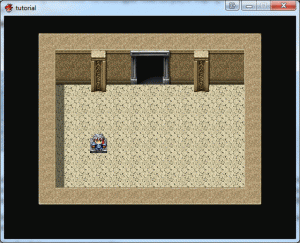 (click the image for a full view with animation)
Pretty neat, right? But no matter what the player does, he can’t get through that door!
The next thing we need to do is create the block that the player can push onto the switch—but that will be covered in part two. Check it out. :)


