


In one of my previous spriting tutorials, we created the south-facing view for an RPG base. Before we can jump into animating that base with a walk cycle, we’ve got to spin him around! In most RPGs, your characters will be able to walk in four directions (some RPGs use eight-directional movement, but we’re not going to get into diagonals right now—maybe in another tutorial).
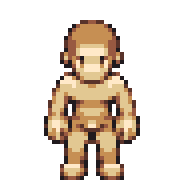
You should remember this guy:
We want to create two other versions of this sprite: north and east/west. Because we are just working on creating the base for the character, we can cut some corners and make a single side-view sprite. I strongly suggest that when it comes to creating your actual character sprites (especially for important characters, like your heroes), you avoid the flipping shortcut. But the purpose of the base is to create a guide on which to build your characters, so in this case, it’s okay to create a single side-view and flip it.
The first thing that I want to do is create some guidelines. It’s important that no matter what direction the sprite is facing, his proportions match up.
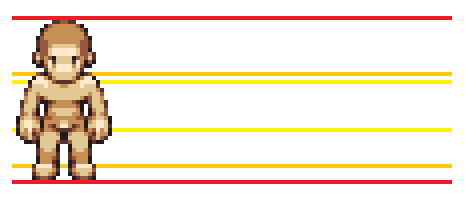
In this example, I use different colors to keep the guidelines straight. The red ones fall outside the sprite, and give me the top and bottom borders so that the overall height is consistent. The orange lines signify the shoulders and the ankles, and the yellow lines meet with the chin and the crotch.
You can use less guidelines or more; as long as you have a way to keep your proportions consistent across all the views. For example, you could put a guideline at the bottom of the chest; or the top of the forehead. However, note that I intentionally chose not to put a guideline at the hands or elbows—those guides might be useful for creating the north-facing sprite, but when it comes to the side-view I will omit the arms and draw them in after building the torso.
Once we’ve gotten our guidelines laid down, creating the other directions is a simple matter of re-drawing the sprite. We can go back to the steps explained in this tutorial. It can begin to feel a little tedious when you are redrawing the same character multiple times—but such is the nature of pixel art (trust me, this is nothing compared to the tedium of animation).
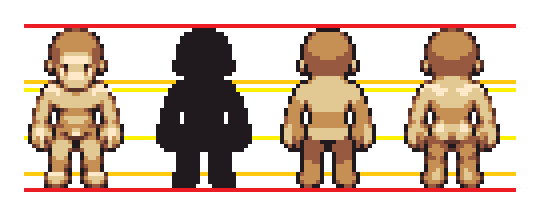
Which view you want to create first is up to you—the side-view or the north-facing view. Personally, I always begin by creating the north-facing sprite (after the south-facing sprite, of course). I find that it’s easy to keep the proportions the same. In fact, here’s a hint: the silhouette for your north-facing sprite can be the same (or very close) to the original silhouette of the south-facing sprite. It’s a useful trick to making sure that the proportions are accurate: to get started on the north-facing view, just copy the south-facing view and fill it in. After that, it’s just a matter of sculpting and refining, like we did before.
The side view is more difficult, but the process is the same.
The biggest difference is in the creation of the silhouette: unlike the north-facing view, we have to create the side views from scratch. The most challenging aspect of this step is to find a width that works well with the style. If the side-views are too thin, the sprite will look awkward then it turns. If they are too thick; then the character will look strange. It’s important to find a nice middle ground where the character will look natural when he turns to the side.
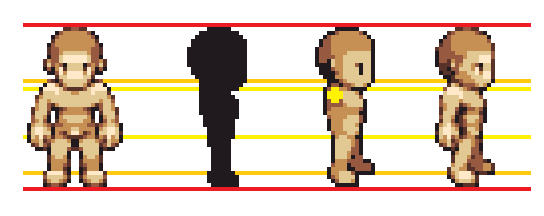
Two more things of note: the arms and legs. You’ll notice that I initially did not attach the arm to the sprite, but instead put a yellow “node” where the arm would connect to the shoulder. I usually create the body and legs in full before adding on the arm afterwards.
When I create my side-view sprites, I make two versions: one with arms and one without. I also keep a copy of the arms separately. It saves time later on when it comes to animating the walk cycle.
If you look at the legs in the finalized sprites, you can tell that they are very different than the silhouette form. We’re not working with a perfect side-view here; in the RPG perspective, it can be useful to show both legs. Now truthfully it isn’t perfectly accurate—the way that the legs are spread like that—but it creates the illusion of depth and help gives the sprite a more solid feeling overall. Remember that readability and depth are the main goals that you want to achieve with your sprite.
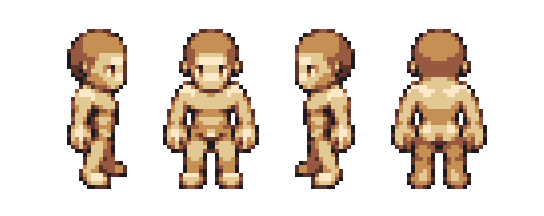
So we’ve finished all four directions for our RPG base!
The only thing we have to do next is animate. But before that, we’ve got some more to cover about tiles. See you next time!
Next: Tiling Tiles