Introduction
Howdy! Uncle Despain here, with the second part of my tutorial on RPG Maker VX Ace’s switch and variable functions.
The previous tutorial explained what switches and variables are, and then we walked through the creation of a treasure chest event. We used switches and self switches, and learned about event pages and their conditions. In this part of the tutorial, we’re going to expand on that knowledge by using variables. If you haven’t read part one, check it out now, because this tutorial builds off of the elements introduced there.
The Chicken Game
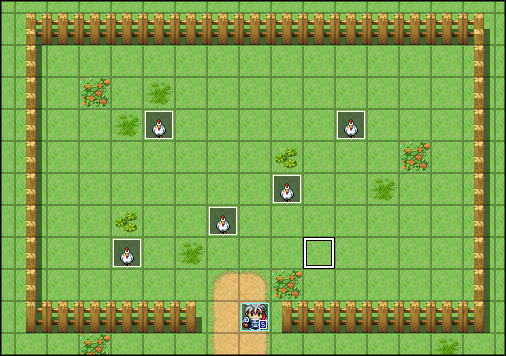
In this tutorial, we’re going to create a minigame where the player must collect chickens, and we are going to use a variable to keep track of how many chickens he has picked up. We’ll start by setting up the chicken event:
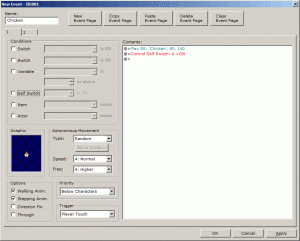 (click the image for a full view with animation)
The event right now has a simple two-page setup. The first page is the chicken itself—when the player walks on top of the chicken (note that the priority it set to “Below Characters” and the trigger is set to “Player Touch”), the chicken will disappear. In this case, we use a self switch to make the chicken disappear when the player touches it. Page 2 of the event is blank, and it is activated by the self switch.
Now, in order to turn this chicken into a minigame, we’re going to need a way to keep track of many chickens the player has caught. In order to do this, we can use a variable.
Adding to a Variable
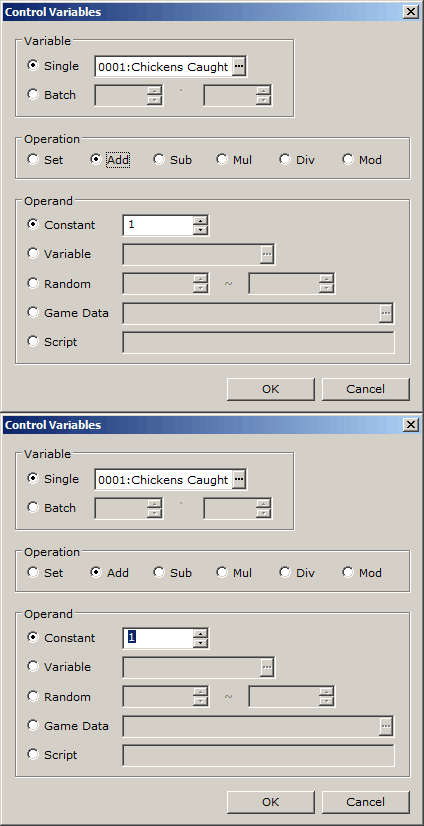
On the first page, insert a new event command on the line before the self switch is activated. In the “Game Progression” command category, select “Control Variables”. This is similar to how you set up a switch before, but you’ll notice that the “Control Variables” window is a lot more complicated:
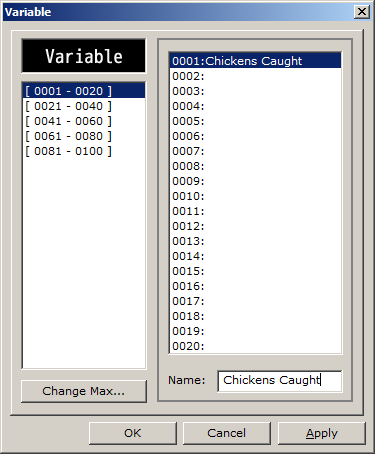
The top part should be familiar: you can choose to modify a single variable of a range of them. If you click on the “…” icon, you’ll see another familiar window:
The variable list is the same as the switch list that we looked at in part one. Again, you can name each variable. For our example, I’m going to give the variable a suitable name, and then OK back to the “Control Variables” window.
I briefly explained in the first part of the tutorial that a variable is a number: when you modify a variable in this window, you will be manipulating the number that is store into at variable. In this tutorial, the variable 001, “Chickens Caught”, will keep track of the amount of chickens that the player has picked up.
The “Operation” section gives you a choice of how you want to manipulate the variable. The first option, “Set”, will directly set the variable to the number of your choice. For our example, we want to select the “Add” operation (the other options are other mathematical operations: subtraction, multiplication, division and mod/remainder).
The “Operand” section is where you define what number you want to manipulate the variable with. You can define a specific number with “Constant”, or you can pull numbers from other variables, random numbers, or from game data. For our example, simply choose a constant number of one.
When you OK back out, your event contents should look like this:
This means that whenever the player runs over the chicken, the event will add 1 to the value of the “Chickens Caught” variable. Remember that by default, the value of every variable is zero.
Displaying a Variable
Remember that we used a self switch to hide the chicken after it’s caught? We did this so that we can copy and paste the chicken event as many times as we want without having to edit every one. Go ahead: paste a few copies of the chicken event.
Then go ahead and give your game a test play; try to gather up all the chickens. If you press F9 during the game to open the switches and variables debug menu, you can see that the variable will accurately reflect how many chickens you have caught:
Now, the next step is to do reflect that number within the game itself. Let’s do that by creating a new event, an NPC who will keep track for the player.
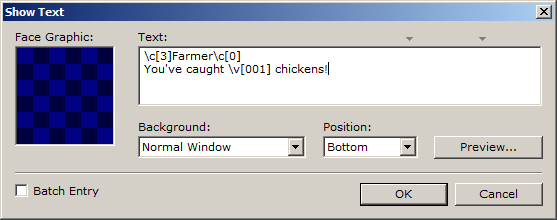
Make an event with a character graphic, and insert a new event command: choose “Show Text” from the “Message” command category:
One of the really cool things about RPG Maker VX Ace‘s “Show Text” command is the versatility of special codes that can customize the message. In this example, I use color codes (c[3]) to separate the speaker’s name from his words.
More relevant to this tutorial, however, is the code for displaying the contents of a variable: v[n], where n is the number of the variable. In this case, the code will display the number of caught chickens within the farmer’s dialogue.
Check it out in-game:
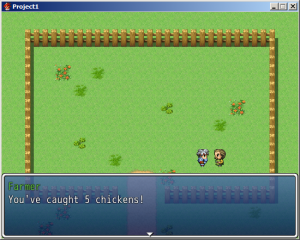 (click the image for a full view)
Congrats! You’ve finished the basics for the chicken-catching minigame using variables. You should be comfortable creating and manipulating variables and displaying them in messages. You can also use them in the event page conditions, like we did in the switches in part one of this tutorial.
We’re almost done with this tutorial, but there’s one final touch to make our chicken game perfect.
Using Conditional Branches
The way that the event is set up right now, there’s a grammatical problem if you’ve caught only one chicken. The farmer will still say “chickens”. If we want to polish this event, there’s a quick way to do it by using a really useful event command: the conditional branch.
In your farmer event, insert a new event command. “Conditional Branch” is under the “Flow Control” command category.
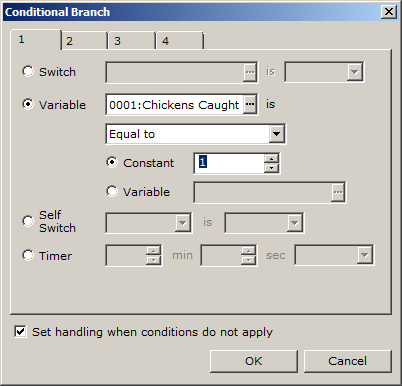
A conditional branch creates a fork within your event’s contents; it is functionally an if-then condition (the check box at the bottom, “handling when conditions to not apply”, creates an alternate branch that makes it if-then-else). In other words, you can have your event react different depending on different game scenarios. The options should be somewhat familiar: you can check whether a switch or self switch is on or off, you can check the value’s relation to a set number or to another variable’s value, and plenty more.
Let’s put it in action: Select the “001: Chickens Caught” variable that we’ve been using. In this case, we want to give the farmer a different reply when the player has caught exactly one chicken, so you’d set up the branch to check if our variable is equal to the number 1.
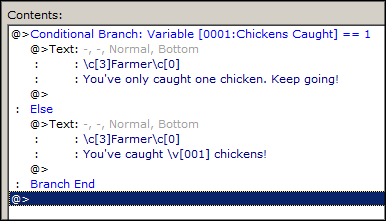
When you OK back out, make sure to move your original text so that it is in the “else” half of the branch (by copying and pasting it), and then create another message inside the first condition. It should look something like this:
Try it out by test playing your game. Talk to your farmer after catching only one chicken, and then again after a few more.
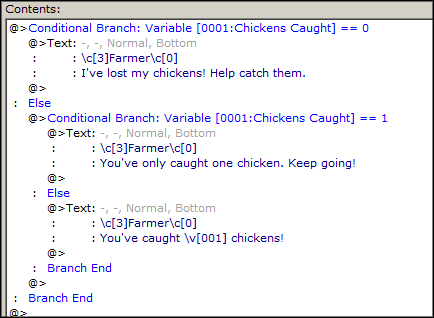
You can also next multiple conditional branches inside each other. I decided that I would add another branch to give the farmer something to say before we’ve caught any chickens.
You can take this even further; maybe you want the farmer to give you a reward if you catch more than 5 chickens—and then, using a self switch, you can make him simply say thanks if the player talks to him again after that. Give it a try.
Conclusion
That’s it for part two of this tutorial. By now you should be comfortable with a basic understanding of variables and conditional branches, in addition to the material that we covered in the first part of the tutorial.
Use what you’ve learned and don’t be afraid to dive deeper into the program and experiment. Thanks for reading. Have fun!


