Introduction
Howdy. Uncle Despain here, with the first of my RPG Maker VX Ace tutorials.
This tutorial is going to tell you everything (well—almost everything) that you need to know about two of the most important features of the RPG Maker program: switches and variables. This is the first part of the tutorial, and it will teach you how and when to use switches. Part two will go a little deeper into the uses for variables.
This tutorial is written for beginners who are diving into the depths of the program for the first time—but I’m not going to be covering the basic interface stuff (that will come in another tutorial). This tutorial is written with the assumption that you understand the most basic elements of the RPG Maker VX Ace interface.
But before we start trying to use switches or variables, it’s important to understand what they are.
What is a Switch?
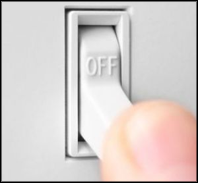
Switches are much easier than they seem at first glance. A switch in RPG Maker VX Ace is just like the light switch on the wall next to you.
A switch has two positions: on and off, and you can flip it whenever you want within events. Your game will keep track of which position each switch is in. When you flip a switch in an event, the game will remember if that switch is turned on or off. What those positions mean is up to you; the primary use is to activate or de-activate events, but the possibilities are limitless.
What is a Variable?
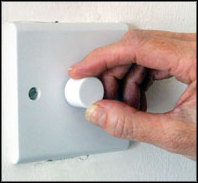
Variables aren’t much more complicated than switches. Think about it this way: if a switch is like a light switch, then a variable is like a dimmer dial: it works the same way, but instead of only two positions (on or off), there is no limit on the amount of positions a variable can have.
If you’re familiar at all with programming, then you know that a variable is a stand-in for a number (a number that varies). In RPG Maker VX Ace, it works the same way: using events, you can set a variable to any numerical value, and the game will store that value. The variable can then be used in a bunch of different ways.
If these descriptions still seem confusing at all, don’t worry: it’s time to start putting this stuff into action.
Flicking a Switch
We’re going to start by creating a treasure chest event. After the player interacts with the chest for the first time and finds his booty, a switch will ensure that the chest remains empty. In RPG Maker VX Ace, you can use the “Quick Event Creation” command to have the program generate treasure chests for you—but for this tutorial we want to make the chest ourselves.
Let’s start off by creating a new event:
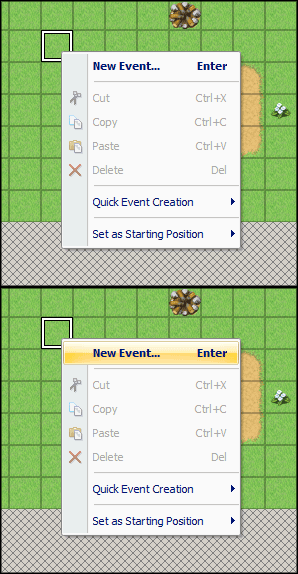
You can choose a suitable chest graphic (remember to check the “Direction Fix” box to prevent the graphic from changing when the player interacts with it from an angle) and use an event command to add an item to the party’s inventory. You’ll probably want to create a message telling the player what he found, too.
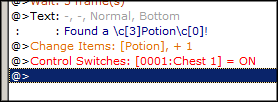
At this point, the event looks something like this:
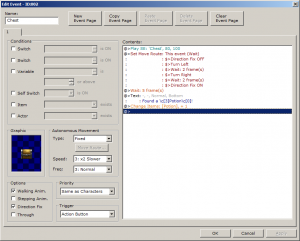 (click the image for a full view)
Now, if you were to test play the game right now, you would see that the player can open the chest as many times as he wants. Infinite potions!
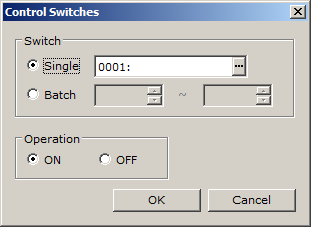
The way to prevent this from happening is to use a switch. Insert a new event command at the end of your “contents” list: select “Control Switches” from the “Game Progression” command category.
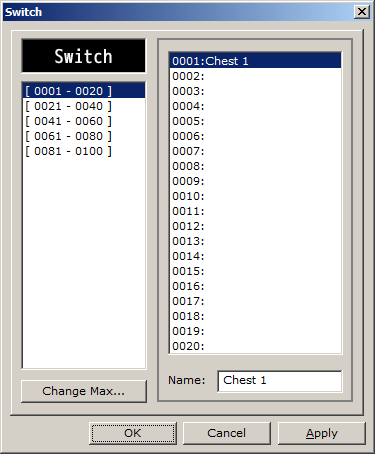
The “Control Switches” dialogue box is simple: select your switch (or a range of switches) and then choose whether to turn it on or off. If you click on the little “…” icon, you will see a list of all the switches that are being used in your game:
You can give each switch a unique name, so that you never get confused as to what switch does what. It’s useful to give each a switch a short but descriptive name. In this cast, we’ll name our switch the suitably simple “Chest 1”. Once you’ve got your switch selected, you can OK out of that, and then OK again out of the “Control Switches” box. Remember to set the operation to on.
The contents of your event should now have this line:
This line means that the event is setting the “001: Chest 1” switch into its on position (by default, all switches are set to off, so we are activating a switch when we turn it on). When the player opens up the chest and takes his booty, the switch will be turned on as well.
Test play your game and give it a try. Interact with the chest, and then press “F9” on your keyboard to bring up the switches and variables debug menu. You’ll see that switch 001, “Chest 1”, has been turned on.
But you can still open the chest a bunch of times and get infinite potions!
The switch has been turned on, but it isn’t doing anything yet. The next thing we need to do is make the game care that the switch has been turned on.
Pages and Conditions
At the top of the “Edit Event” window, there is a line of button for page controls. Go ahead and create a new page.
An event page acts almost like a whole new event—you can give it a different graphic, different triggers, different commands, etc. Events can have up to 99 pages.
You want to set up Page 2 to be the treasure chest after the player has opened it and taken his booty:
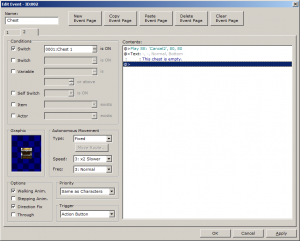 (click the image for a full view)
The page with the highest number will always be displayed by default: the game processes higher-numbered pages as having a higher priority. This means that the new page with the opened chest will overwrite the first page even before the player opens the chest, unless we set it to appear only when specific conditions are met.
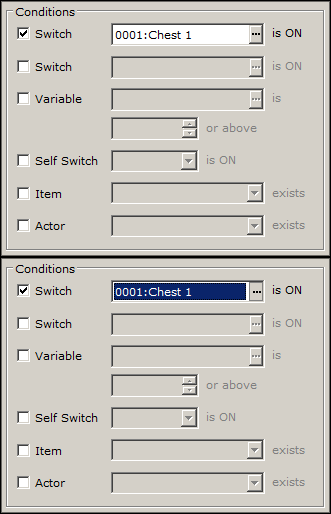
Let’s make it so that Page 2 will appear after we have turned on our “Chest 1” switch.
Now, as soon as the switch is turned on, the second page will take over. If you test the game now, everything should be working perfectly.
Congrats! You’ve successfully made a chest using switches.
Using Self Switches
Now that you understand switches and how to use an event’s pages and conditions, it’s useful to know when to use a self switch instead of a regular switch.
A self switch is the same as a regular switch, except that it only exists within the current event. The switch that we created above, “001: Chest 1”, can be used in other events, because it’s a regular—or a global—switch. When it’s turned on, any other event in your game can recognize that—this is useful for creating side quests or developing the major story moments in your game.
But for little events that don’t affect anything other than themselves, like the chest that we just created, it is usually a better practice to use a self-switch.
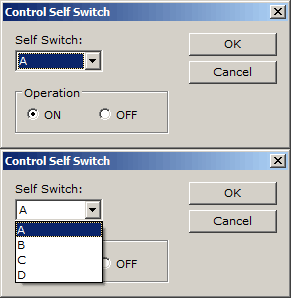
Go back to the first page of the event and delete the command that turns on the “Chest 1” switch. In its place, create a new command: select “Control Self Switch” from the “Game Progression” command category. Each event has up to four internal self switches. In this case, let’s set self switch “A” to on.
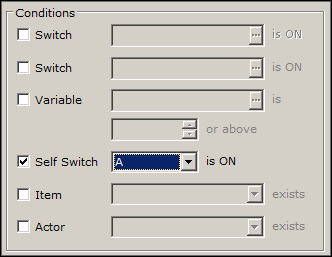
And then, on Page 2, you’d want to change the conditions as well. We’re not using the “Chest 1” switch anymore—this time you’d set the condition to appear when Self Switch “A” is turned on.
The functionality of the event will remain the same—go ahead and give it another test play.
Because the self switch is contained within the event, you can copy and paste the same treasure chest as many times as you’d like. If they all used the same global switch, they would all open together when the player opens one of them. Now that you are using self switches, each event handles its pages and conditions internally. It’s also cleaner and much more organized—you don’t need to worry about switches clogging up your global switch list for every treasure chest or locked door in your game.
That’s all you need to know to get started with switches—both global and self.
In part two of this tutorial, we’ll take a look at variables. If you’re comfortable with what we’ve covered so far, check it out.


